You need the fees management duty. Set the current session and term first (Set the session and term).
Open Fees, then the Fee set-up tab.
1. Fee items
These are what your school charges for: Tuition, Lunch, Bus and so on.
Type an item’s name and press Add. Switch an item off to stop it being added to new bills.
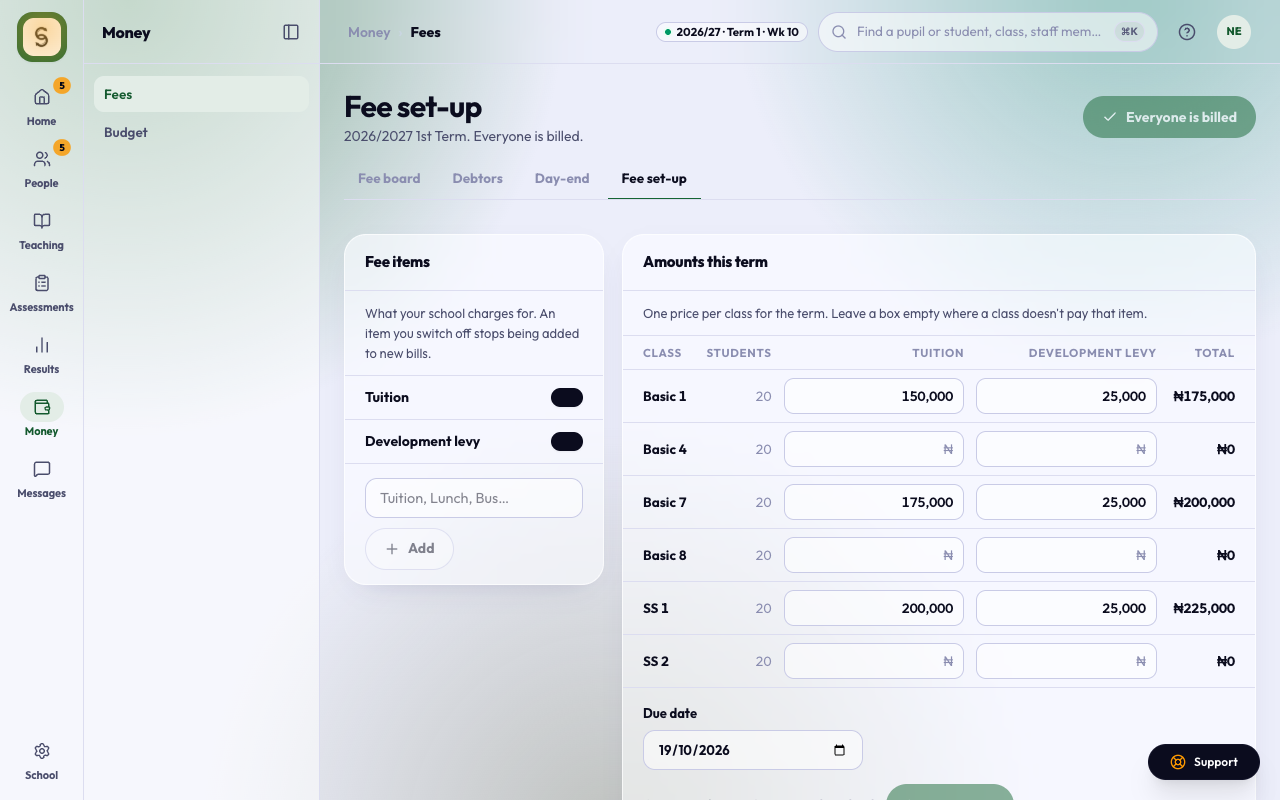
2. Amounts this term
Fill in one price per class for each item. Leave a box empty where a class doesn’t pay that item. Set the Due date, then press Save amounts.
You can change an amount after billing. Bills update, but never below what a student has already paid.
3. Discounts
Discounts stand: each new term’s bill gets them until you remove them. A student gets only their biggest discount.
- Applied on their own: turn on Children of staff or Second child and after, with the percentage. You can also waive the application and acceptance fees for staff children.
- Given by hand: enter a Discount name and Percentage off, and press Add.
- For one student: search for them under Give a student a discount, choose the discount or Exempt (with a reason), and press Save.
Removing a discount asks why it’s coming off.
4. Bill the term
Press Bill students at the top. Each student gets a bill from their class’s amounts, less any discount. When it says Everyone is billed, you’re done.
Online payments
If your school takes fees online, set up the account the money goes to under Online payments:
- Press Set up an account.
- Enter the bank, account number and account name, and press Propose.
- A second person who manages fees presses Approve.
It always takes two people to set up or change the account.